Objective
Embed the CallHQ Web Call Widget on your website to enable real-time voice conversations with your AI assistant. Ideal for capturing leads, automating support, or enabling voice-based interaction directly on your site.
Follow these simple steps to generate and embed your personalized script:
1. Visit the Dashboard
Go to https://web.callhq.ai and log in using your CallHQ credentials.
On the left-hand sidebar, click:
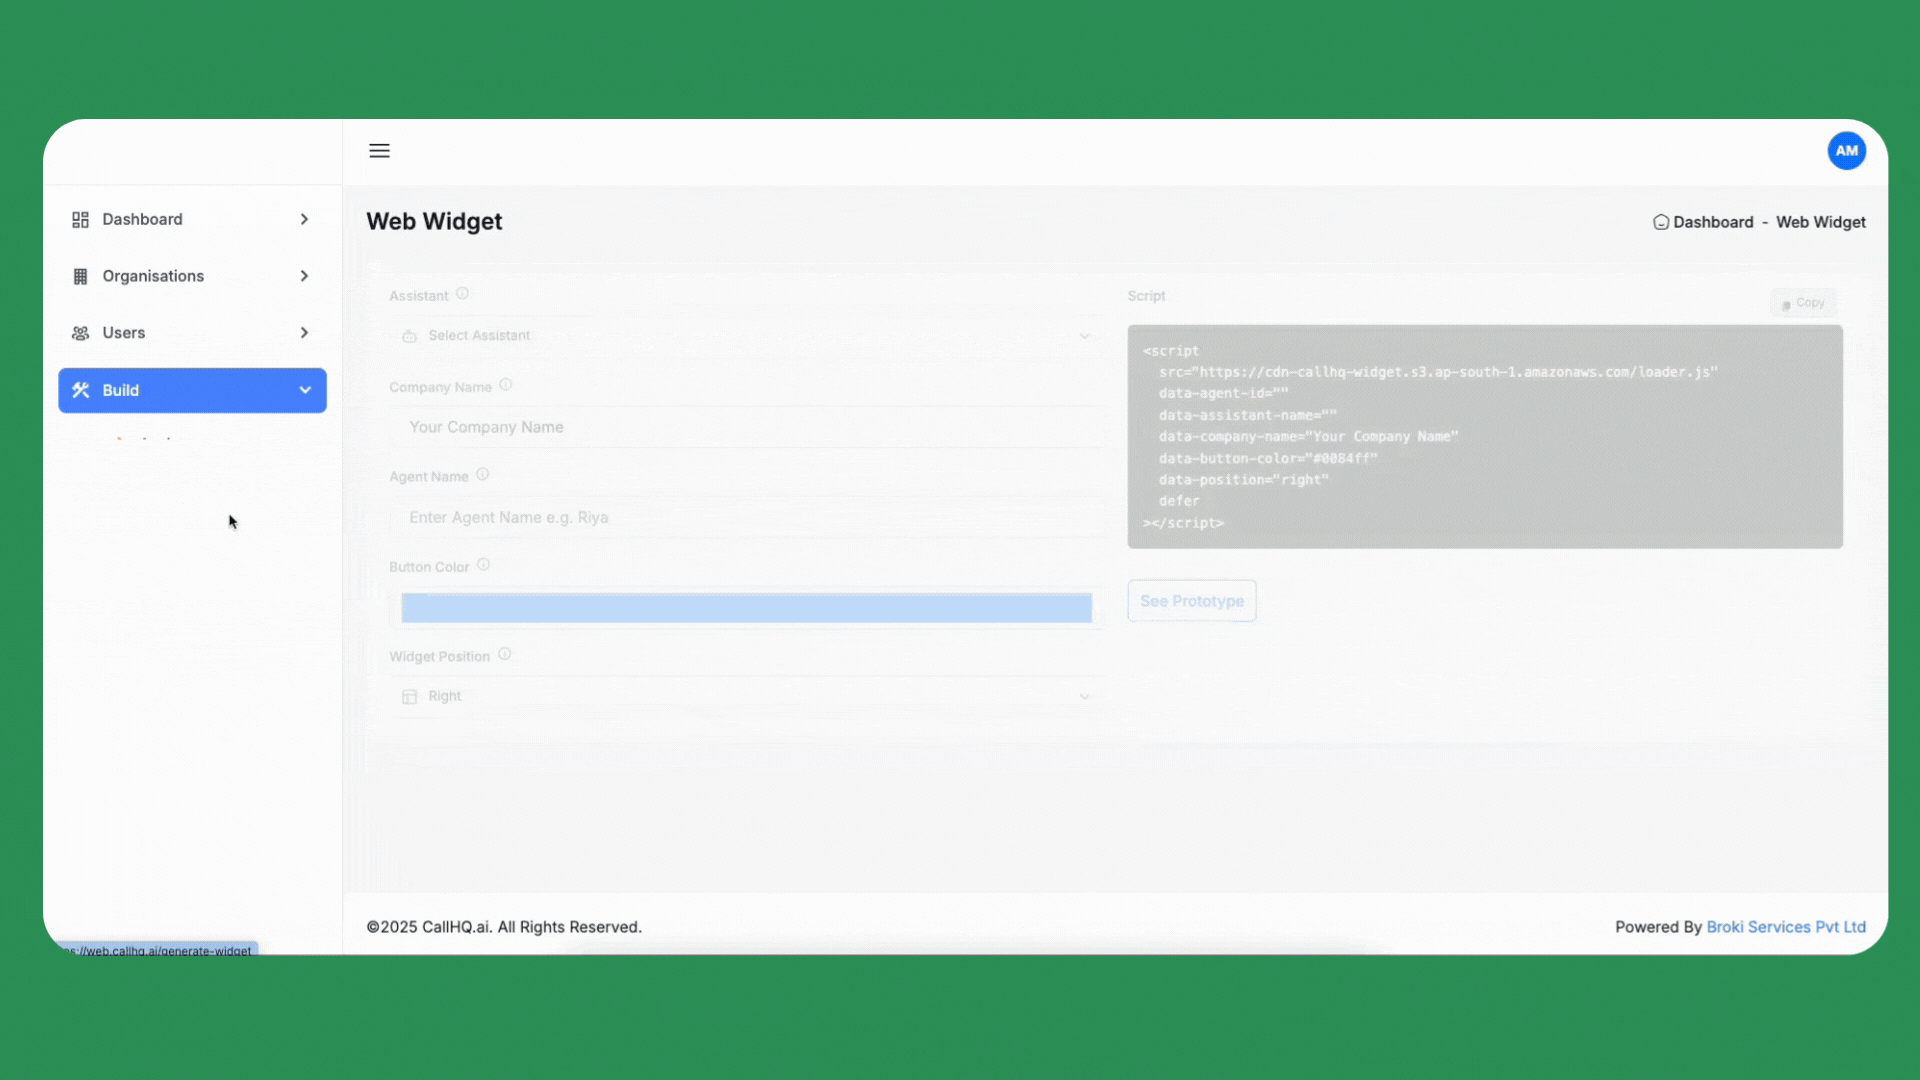
Build → Web Widget
This will open the configuration page where you can customize your widget.
Fill in the fields as shown:
- Assistant: Choose the assistant you want to embed (e.g., Tripclap)
- Company Name: This will appear in the widget header
- Agent Name: Your AI agent’s name (e.g., Riya)
- Button Color: Customize the widget button color (hex format, e.g.
#0084ff)
- Widget Position: Choose whether the widget appears on the left or right of the screen
4. Copy the Script
Once filled, a script tag will appear on the right. It will look like this:
<script
  src="https://cdn-callhq-widget.s3.ap-south-1.amazonaws.com/loader.js"
  data-agent-id="your-agent-id"
  data-assistant-id="your-assistant-id"
  data-company-name="Your Company Name"
  data-button-color="#0084ff"
  data-position="right"
  defer
></script>
5. Embed in Your Site
Paste the copied script before the closing </body> tag of your HTML page, or inside your site’s layout file if using a framework like React, Next.js, or Vue.
Example Use Case
- On a product page, enable voice support for visitor questions.
- On a contact form, initiate live qualification via voice instead of waiting for form submissions.
- Use in a landing page to improve lead conversion through human-like conversation.
Preview
To test before embedding, click See Prototype inside the dashboard.